SSL通信をラズパイwebサーバに装備!その手順を経緯から詳しくご紹介
近年、セキュリティ意識の高まりから、WebサイトのSSL化は必須となっています。
この度、サーチコンソールにて、このhttps化が導入され、Raspberry Pi(ラズパイ)Webサーバを運用している60爺のブログが安全でないとの診断が下されました。
本記事では、ラズパイにSSL通信を装備するための手順を、導入の背景や必要な準備から丁寧にご紹介します。
オープンソースの無料SSL証明書「Let’s Encrypt」や「Certbot」の活用、ポートの設定、定期更新の仕組みまで、初心者でも無理なく進められる内容を目指しています。
セキュアな通信環境を自宅サーバでも実現したい方は、ぜひ一歩ずつ一緒に進めていきましょう。
SSL化を目指した経緯
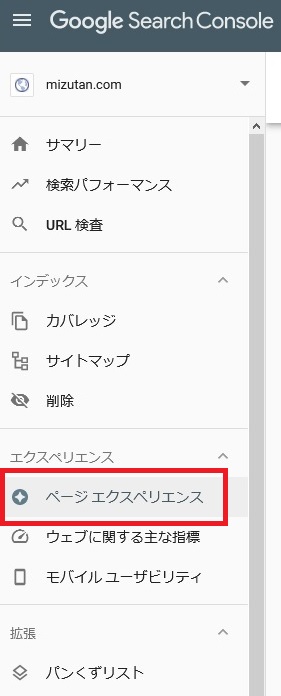
search console にページエクスペリエンスなるものが追加されました。
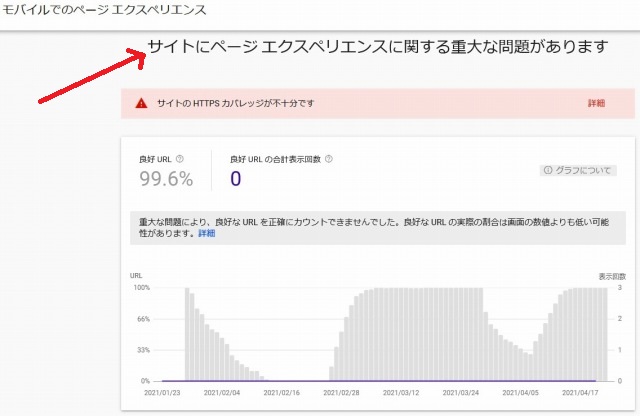
ここに、「サイトにページエクスペリエンスに関する重大な問題があります」なるメッセージが表示されました。
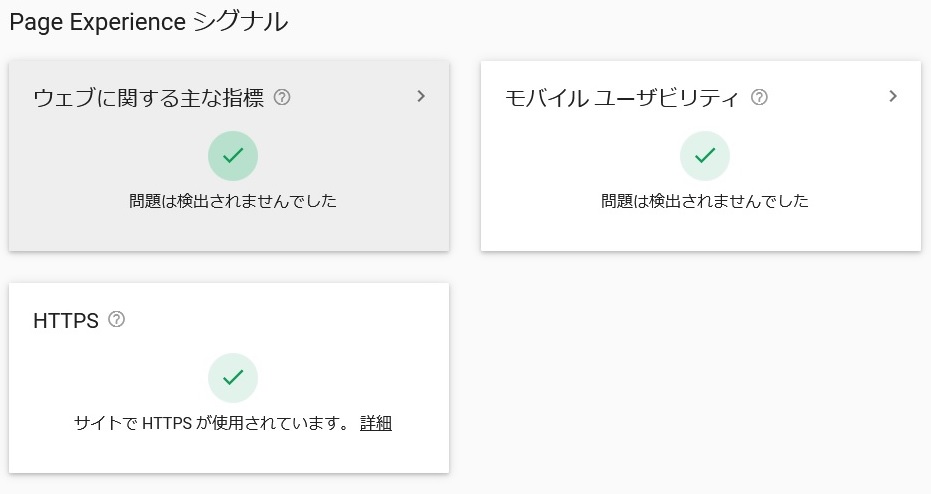
ページエクスペリエンスシグナルを見ると、HTTPS には朱書きで「失敗」と表示されています。
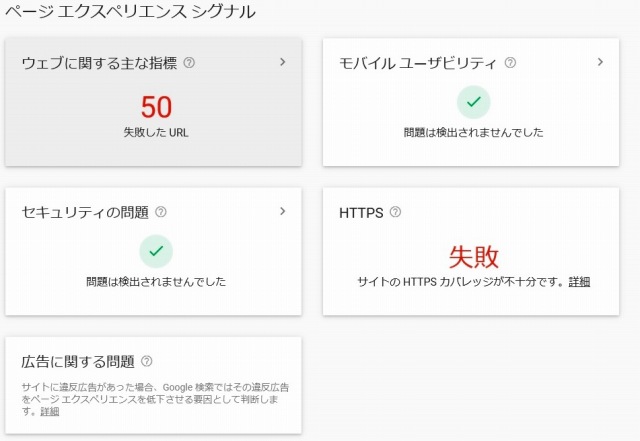
ここにある「サイトのHTTPSカバレッジが不十分です」の右側の「詳細」をクリックしたところ、ヘルプ画面が表示されました。
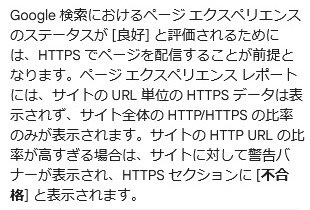
ページ エクスペリエンスのステータスが [良好] と判断されるためには、ページが HTTPS で配信されている必要があるそうです。
この時点での、「60爺の手習い」及び「60爺の読書の部屋」は httpsで配信されていません。
search console でエラーが出るのは嫌ですし、安全性を図るためにも、これを機にSSL化を図ることにしました。
SSL(Secure Sockets Layer の略です)とは、簡単にいうと Webサイトとそのサイトを閲覧しているユーザとのやり取り(通信)を暗号化するための仕組みです。
SSL化の実施手順
さて、SSL化の手順なんですが、証明書を取得する必要があるようです。
その証明書を設定したあと、いくつかの設定が必要なようです。
次の手順で実施します。
- Let’s Encryptで証明書を取得
- apacheの設定
- wordpress他の訂正
- SSL証明書延長
それでは、これらの手順を一つずつ細かく見ていきます。
Let’s Encryptで証明書を取得
https化するには、証明書をもらわねばなりませんが費用はかけたくありません。
そこで、証明書を無料で発行してくれる非営利団体Let’s Encryptを利用しようと思います。
Let’s Encrypt は、非営利団体のInternet Security Research Group (ISRG)により運営されている証明書認証局で、TLSのX.509証明書を無料で発行しています。証明書の有効期間は90日で、期間内のいつでも証明書の再発行を行うことができます。発行はすべて自動化されたプロセスで行われており、安全なウェブサイトを実現するために、証明書の作成、受け入れテスト、署名、インストール、更新を手動で行う必要があった問題を克服するように設計されています。
引用 wiki Let’s Encrypt
ここに記されているように、「証明書を無料で発行」しています。
証明書には90日間という期限があり、再発行もできると記されていますね。
cerbot のインストール
始めに、Let’s Encrypt を利用するためのクライアントソフトをインストールします。
sudo apt-get install certbot証明書取得でミス
インストール終了後、以下を実行します。
対話的に操作が可能ですので、ひとつづつ答えていきます。
sudo certbot certonly
Saving debug log to /var/log/letsencrypt/letsencrypt.log
How would you like to authenticate with the ACME CA?
- - - - - - - - - - - - - - - - - - - - - - - - - - - - - - - - - - - - - - - -
1: Spin up a temporary webserver (standalone)
2: Place files in webroot directory (webroot)
- - - - - - - - - - - - - - - - - - - - - - - - - - - - - - - - - - - - - - - -
Select the appropriate number [1-2] then [enter] (press 'c' to cancel): 2
Plugins selected: Authenticator webroot, Installer None
Enter email address (used for urgent renewal and security notices) (Enter 'c' to
cancel): yu_miz@r5.dion.ne.jp
- - - - - - - - - - - - - - - - - - - - - - - - - - - - - - - - - - - - - - - -
Please read the Terms of Service at
https://letsencrypt.org/documents/LE-SA-v1.2-November-15-2017.pdf. You must
agree in order to register with the ACME server at
https://acme-v02.api.letsencrypt.org/directory
- - - - - - - - - - - - - - - - - - - - - - - - - - - - - - - - - - - - - - - -
(A)gree/(C)ancel: A
- - - - - - - - - - - - - - - - - - - - - - - - - - - - - - - - - - - - - - - -
Would you be willing to share your email address with the Electronic Frontier
Foundation, a founding partner of the Let's Encrypt project and the non-profit
organization that develops Certbot? We'd like to send you email about our work
encrypting the web, EFF news, campaigns, and ways to support digital freedom.
- - - - - - - - - - - - - - - - - - - - - - - - - - - - - - - - - - - - - - - -
(Y)es/(N)o: Y
Please enter in your domain name(s) (comma and/or space separated) (Enter 'c'
to cancel): mizutan.com
Obtaining a new certificate
Performing the following challenges:
http-01 challenge for mizutan.com
Input the webroot for mizutan.com: (Enter 'c' to cancel): /var/www/
Waiting for verification...
Cleaning up challenges
Failed authorization procedure. mizutan.com (http-01): urn:ietf:params:acme:error:dns :: No valid IP addresses found for mizutan.com
IMPORTANT NOTES:
- The following errors were reported by the server:
Domain: mizutan.com
Type: None
Detail: No valid IP addresses found for mizutan.com
- Your account credentials have been saved in your Certbot
configuration directory at /etc/letsencrypt. You should make a
secure backup of this folder now. This configuration directory will
also contain certificates and private keys obtained by Certbot so
making regular backups of this folder is ideal.
正しいドメインをしてしていれば、ここで、証明書が取得できたはずなんですが、your domain name と webroot を間違えたようでエラーが発生してしまいました。
さて困ったぞ!
再挑戦
もう一度、証明書取得に再チャレンジします。
次のコマンドを打ちました。
sudo certbot certonly --webroot -w /var/www/html -d www.mizutan.com --renew-by-default --email yu_miz@r5.dion.ne.jpSaving debug log to /var/log/letsencrypt/letsencrypt.log
Plugins selected: Authenticator webroot, Installer None
Obtaining a new certificate
Performing the following challenges:
http-01 challenge for www.mizutan.com
Using the webroot path /var/www/html for all unmatched domains.
Waiting for verification...
Cleaning up challenges
IMPORTANT NOTES:
- Congratulations! Your certificate and chain have been saved at:
/etc/letsencrypt/live/www.mizutan.com/fullchain.pem
Your key file has been saved at:
/etc/letsencrypt/live/www.mizutan.com/privkey.pem
Your cert will expire on 2021-07-26. To obtain a new or tweaked
version of this certificate in the future, simply run certbot
again. To non-interactively renew *all* of your certificates, run
"certbot renew"
- If you like Certbot, please consider supporting our work by:
Donating to ISRG / Let's Encrypt: https://letsencrypt.org/donate
Donating to EFF: https://eff.org/donate-le今度はうまく取得できたようです。
/etc/letsencrypt/live/www.mizutan.com/ 配下に必要なファイルが格納されました。
root@raspberrypi:/etc/letsencrypt/live/www.mizutan.com# ls -l
合計 4
-rw-r--r-- 1 root root 692 4月 27 10:36 README
lrwxrwxrwx 1 root root 39 4月 27 10:36 cert.pem -> ../../archive/www.mizutan.com/cert1.pem
lrwxrwxrwx 1 root root 40 4月 27 10:36 chain.pem -> ../../archive/www.mizutan.com/chain1.pem
lrwxrwxrwx 1 root root 44 4月 27 10:36 fullchain.pem -> ../../archive/www.mizutan.com/fullchain1.pem
lrwxrwxrwx 1 root root 42 4月 27 10:36 privkey.pem -> ../../archive/www.mizutan.com/privkey1.pem
合わせて、book.mizutan.com の証明書も取得します。
sudo certbot certonly --webroot -w /var/www/html_book -d book.mizutan.com --renew-by-default --email yu_miz@r5.dion.ne.jpSaving debug log to /var/log/letsencrypt/letsencrypt.log
Plugins selected: Authenticator webroot, Installer None
Obtaining a new certificate
Performing the following challenges:
http-01 challenge for book.mizutan.com
Using the webroot path /var/www/html_book for all unmatched domains.
Waiting for verification...
Cleaning up challenges
IMPORTANT NOTES:
- Congratulations! Your certificate and chain have been saved at:
/etc/letsencrypt/live/book.mizutan.com/fullchain.pem
Your key file has been saved at:
/etc/letsencrypt/live/book.mizutan.com/privkey.pem
Your cert will expire on 2021-07-27. To obtain a new or tweaked
version of this certificate in the future, simply run certbot
again. To non-interactively renew *all* of your certificates, run
"certbot renew"
- If you like Certbot, please consider supporting our work by:
Donating to ISRG / Let's Encrypt: https://letsencrypt.org/donate
Donating to EFF: https://eff.org/donate-leapache の設定
/etc/apache2/sites-ava-laable のネームベースの VirtualHost で SSL を使えるようにします。
mod_sslを有効化
VirtualHost の修正の前に、ApacheでHTTPSで通信できるようにmod_sslを有効化します。
これを行わないと、VirtualHost を訂正してもエラーになってしまいます。
HTTPSで通信できるように次のコマンドを打ってください。
なお、a2enmodというのは、「Apache2 Enable Module」の略のようです。
sudo a2enmod sslVirtualHost設定
今まで、NameVirtualHost で 80 ポートで待ち受けたものに、SSL を使えるように 443 ポートでも待ち受けるように設定します。
そして、VirtualHost の設定で、80 番ポートと同様の記述を 443 番ポートでもした後、SSL の設定を書き加えます。
<VirtualHost *:80>
DocumentRoot /var/www/html
ServerName www.mizutan.com
<Directory "/var/www/html/">
Require all granted
</Directory>
# Alias /wordpress/ "/var/www/wordpress/"
Alias /wordpress /var/www/wordpress
<Directory "/var/www/wordpress/">
Require all granted
</Directory>
</VirtualHost>
<VirtualHost *:443>
DocumentRoot /var/www/html
ServerName www.mizutan.com
SSLEngine on
SSLCertificateFile /etc/letsencrypt/live/www.mizutan.com/fullchain.pem
SSLCertificateKeyFile /etc/letsencrypt/live/www.mizutan.com/privkey.pem
SSLCertificateChainFile /etc/letsencrypt/live/www.mizutan.com/chain.pem
<Directory "/var/www/html/">
Require all granted
</Directory>
Alias /wordpress /var/www/wordpress
<Directory "/var/www/wordpress/">
Require all granted
</Directory>
</VirtualHost>
次に、book.mizutan.com.conf にも同様の設定を行います。
設定後、下記のコマンドを実行してApache設定ファイルにエラーがないかチェックします。
apache2ctl configtestテストの結果としてSyntax OKという応答が返されることを確認します。
root@raspberrypi:/etc/apache2/sites-available# apache2ctl configtest
AH00558: apache2: Could not reliably determine the server's fully qualified domain name, using 127.0.1.1. Set the 'ServerName' directive globally to suppress this message
Syntax OK
この後、下記のコマンドを実行してApacheを再起動します。
service apache2 restart443ポート開放
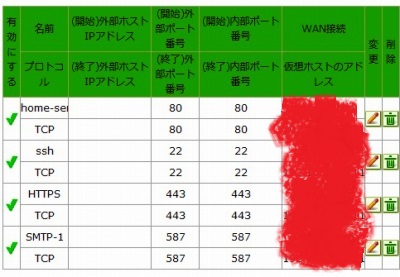
ルータの 443ポートを開放してください。
60爺はnuro光で、ルータは F660A です。このルータでは、ポートフォワーディングの設定でポートの開放が実施できました。
wordpress他の訂正
wordpress訂正
次に、https 化のための WordPress の訂正箇所を示します。
これを実行しないと、ページを https 化しても、「この接続は安全ではありません。
このページの一部(画像など)は安全ではありません。」のメッセージが出てしまいます。
一般設定の訂正
WordPressの設定>一般設定で、次の2項目を https で始まる形に訂正します。
- WordPress アドレス(URL)
- サイトアドレス(URL)

内部リンク・画像URLの訂正
記事等の内部リンクと画像URL等を https で始まる形に訂正します。
これらの訂正量は膨大ですので、手動での訂正は不可能です。そのため、プラグインを用いて対応します。
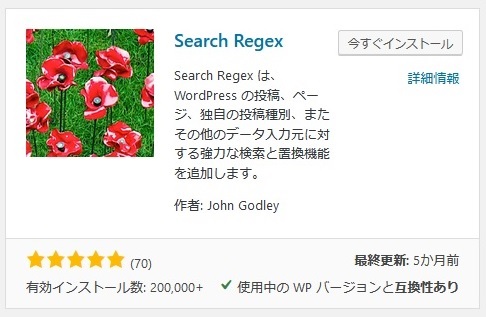
使用するプラグインは、Search Regex です。
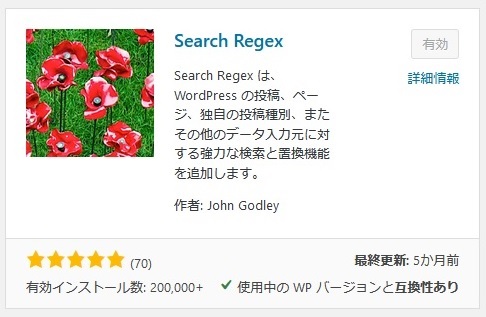
プラグインの新規追加から「Search Regex」をインストールした後、有効化します。
WordPressのツール ⇒ Search Regexにて下記のように、検索に http:// 、置換に https:// と指定します。
さらに、入力元で「すべての投稿種別」を選択し検索をクリックします。
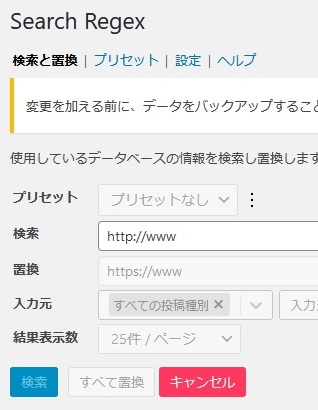
検索結果が表示されますので、すべて置換をクリックします。
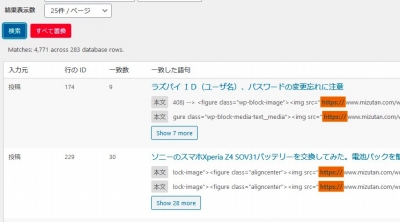
置換の進捗情報が動き出しますので100%になるまで待ちましょう。

index.htmlの訂正
最後に、トップページとして自動で認識してくれる index.html の訂正を行います。
このファイルの中に、http がありますので、これを https に訂正します。
<!DOCTYPE HTML PUBLIC "-//W3C//DTD HTML 4.01 Transitional//EN">
<HTML>
<HEAD>
<TITLE></TITLE>
<meta http-equiv="refresh" content="1;URL=https://www.mizutan.com/wordpress/">
</HEAD>
<BODY>
</BODY>
</HTML>SSL証明書期限
設定したSSL証明書の期限を確認し、期限の延長を設定します。
期限の確認
Let’s Encrypt で取得した SSL証明書の期限を確認しておきましょう。
fullchain.pem のありかがわかれば、openssl コマンドを使用して証明書の期限を確認できます。
管理者権限で実施します。
openssl x509 -in /etc/letsencrypt/live/www.mizutan.com/fullchain.pem -noout -dates結果が以下のように示されます。
notBefore=Apr 27 00:36:05 2021 GMT
notAfter=Jul 26 00:36:05 2021 GMT
notAfterに表示されている日付が証明書の期限ですので、www.mizutan.com の証明書の起源は 2021年7月26日 00:36:05 ですね。
これでラズパイwebサーバのSSL(暗号化)を実現できました!
ページ エクスペリエンス確認
最後に、search console を確認してみましょう。
メッセージが「サイトに優れたページ エクスペリエンスの URL が 100% 件あります」となっており、対応が出来たことがわかりました。
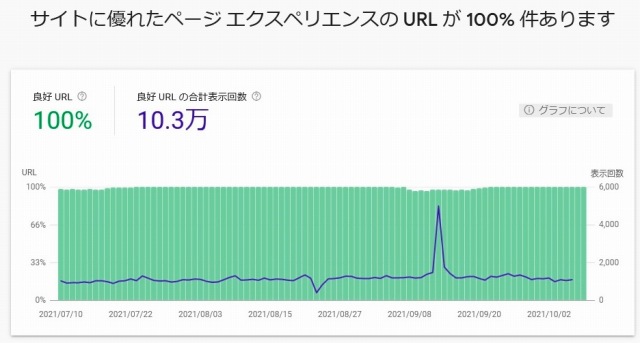
Page Experience シグナルの HTTPS でも、「サイトで HTTPS が使用されています。」となっています。これで対応は完了です。
証明書期限の延長
上述しましたが、Let’s Encrypt の証明書期限は90日です。
そのため、サーバー証明書の期限が来る前に、期限の延長処理を行う必要があります。
サーバー証明書の期限延長処理はコマンド(certbot renew)を実行することで実施できます。
このコマンドを定期的に実施すれば良いわけです。
以下、サーバー証明書更新を定期的に実行するスクリプトを作成します。
【スクリプト】certbot
#!/bin/bash
certbot renew &> /dev/null
【格納場所】
/etc/cron.weekly/certbot【実行権限を付与】
chmod +x /etc/cron.weekly/certbotこれで毎週コマンドが実行されますので、期限切れの心配は不要です。
最後に
サーチコンソールで、ページエクスペリエンスなるモノが追加され、SSL化が必須の時代が来たようです。
60爺のラズパイサーバでも、通信暗号化を図りましょう。
証明書を取得後、https化に必要な各種設定を実施しなければなりません。
今回は、4つの手順で実施した内容を解説しています。
参考
ラズパイwebサーバをhttpsに対応させた
Apache のネームベースの VirtualHost で SSL を使えるようにする
Ubuntu 20.04でLet’s Encryptを使用してApacheを保護する方法
Let’s Encryptのサーバー証明書期限を自動延長するには?
■思えば「ブログ運営」の記事も増えてきました


 60爺
60爺


ディスカッション
ピンバック & トラックバック一覧
[…] […]